
Sourdough Guide

what is sourdough?
Sourdough is bread or other baking that results from a natural process of leavening - it uses a culture of wild yeast and bacteria instead of commercial yeast. It is the oldest form of leavened bread dating back thousands of years. But it’s not just for bread: sourdough can be used to make any number of baked goods such as waffles, crackers, muffins, cakes, and more.
A sourdough culture is created when a mixture of flour and water are allowed to naturally ferment. It is a cultivation of naturally occurring microorganisms that exist all around us - on our hands, in our mouths, in the air, but most importantly on the grain and flour itself.
Sourdough bread and baked goods are not necessarily sour! To avoid this misconception, many bakers prefer the the terms Naturally Leavened, Pain Au Levain, or Levain. It is the bakers themselves who control the degree of sourness, by the way they maintain the sourdough culture and by the methods they use to create the bread.

The Benefits of Sourdough
Sourdough does much more than make bread rise. The bacteria in the sourdough feed off of the flour and create lactic and acetic acids as a byproduct. These are what create the characteristic sourdough flavour, but that’s not all they do. One great benefit of these acids is a naturally longer shelf life. Sourdough breads will last much longer than homemade yeasted breads before staling or becoming mouldy. Another benefit to sourdough is that the extra time the sourdough process takes allows for the microorganisms and natural enzymes in the dough to make it more easily digestible and nutritious.
Creating A Sourdough Culture
The process of creating a sourdough culture is surrounded by mystery and myth. In fact, it is a relatively simple process and requires nothing more than flour, water and time. Creating a healthy sourdough culture usually takes 5-7 days. Flour naturally contains the wild yeasts and bacteria you need, and your job in creating a culture is to simply cultivate them and encourage them to grow. Different bakers use different terms for their sourdough culture. For example, you might come across the terms Leaven, Levain, Mother, Chef, Lievito Madre, but they all refer to the sourdough culture.
Two Things to Consider When Creating a Sourdough Culture
Flour: Organic flour naturally contains more microorganisms and is a good choice for starting your culture. Whole grain flours have a higher mineral content and tend to ferment more quickly than white flours when beginning a culture. Whole grain rye flour has a high mineral content and natural flora and will also help to speed up the process.
Temperature: The ideal temperature to start a sourdough culture is between 27 and 30 degrees C. A warm spot such as the oven with the light on, on top of the fridge, or in a cooler with a bottle of hot water are good options. If you can’t find a location in your house to maintain this temperature, it doesn’t mean you shouldn’t go ahead, it just means the process will move along more slowly.
Note - You can build your sourdough culture with no waste and maintain it with minimal waste by keeping it small. Once the culture is mature and healthy, use discarded starter in your waffles, pancakes, quick breads, etc. The culture adds a great flavour!
What You Do
To create the starter, use a mix of 50% Organic Whole Wheat flour and 50% Organic Whole Rye flour. Make a mix of 400g Whole wheat and 400g Whole Rye.
Day 1 Morning:
Mix 100g flour (Rye/Whole wheat mix) with 100g of warm (32-34C) water. Keep in a warm place (27-30C ideally).Day 2-4 Morning:
Mix 100g flour, 100g warm water, and 50g of previous starter. Discard the remaining starter.Day 3 or 4: The culture should be getting bubbly and developing a tangy or even sour smell. Ideally, it will double or more by the next day’s feeding. If it hasn’t, continue feeding it daily for another day or two.
Day 5-7:
Once your culture is reliably doubling between feedings, begin to give it two feedings (morning and evening) daily. At this point you can also begin storing the starter at room temperature.Final Refresh:
If your starter is now reliably doubling in 8-10 hours, congratulations! You have a healthy sourdough culture. At this point you can switch to using unbleached white flour to feed it. You can maintain a whole grain starter, but it will ferment more quickly, and is more likely to develop off flavours. More advanced bakers can use different flour proportions in feeding to affect the flavour and handling of their dough. For new or novice sourdough bakers, though, it’s best to keep things simple.Refresh the starter and subsequently feed it daily or twice daily using the following recipe:
100g white flour, 100g room temperature water, 20g starter.
Maintaining a Sourdough Culture
If you are baking regularly, it is best to feed your culture on a daily or twice daily schedule. Feeding the culture more regularly will result in a healthier, more active culture and also reduce the buildup of acids and undesirable flavours in your culture.
If you plan on baking less frequently, sourdough can be stored in the fridge. Refrigerated starter should be refreshed with 2-3 feedings before being used. This will freshen up the culture and increase yeast activity. Sourdough culture can withstand relatively long periods (several months) of refrigeration and still be coaxed back to life. Starter stored for longer, or left on the counter unfed, will develop a layer of alcohol (“hooch”) on top, which can simply be poured off before refreshing.
Types of Sourdough Culture
The culture described above is what is referred to as a liquid culture with a hydration of 100% (1:1 ratio of flour to water). Liquid cultures have a hydration of 100-125% (1:1 - 3:4 ratio of flour to water). Liquid cultures favour the production of more mild lactic acid (think yogourt) over acetic acid (think vinegar) and are quicker to ferment. A culture can also be made at a lower hydration of 50-60% (2:1 flour to water) and this is referred to as a stiff or firm starter. These cultures ferment more slowly and favour acetic acid production. Using different types of flour will also have a big impact on your starter in terms of flavour, speed of fermentation, acid production and the actual microorganisms populating your sourdough culture.
Sourdough Techniques
Hand mixing: Mixing is a good way to develop the feel for properly developed dough and is the best way to get started. Most sourdough recipes call for very wet dough and it might take some practice before you’re comfortable handling it.
Step 1 - Incorporate Ingredients:
Add ingredients to your bowl. Reach in and begin mixing the dough, alternating squeezing the dough between your fingers and thumb and pulling the dough up from underneath and pressing it down into the centre of the bowl. The dough will be very sticky, especially at the beginning of the mix. To minimize the mess, try using one hand to mix and the other to hold and rotate the bowl. Wet hands will stick less to the dough so keep a bowl of water near by to keep your mixing hand wet. Use a dough scraper to remove excess dough from your hands. Rotate the bowl as you go. Continue until all dry bits of flour are incorporated. If you are using an Autolyse this first step will involve only mixing the flour and the water.Step 2 - Slap and Fold:
Also known as the French Fold. This is a great technique to develop a wet dough quickly by hand. To begin, turn your fully incorporated dough out onto an unfloured counter. No flour is added during the slap and fold. Keep a bowl of water nearby. Wet hands will stick less to the dough. Clean hands will also stick less to the dough, so if you begin to develop a “dough mitt,” scrape your hands down and get all the dough off, wet your hands and resume. Reach to one side of the dough and keeping your fingers together, place your fingers under the dough and thumbs on top on either side of the dough about two-thirds of the way from the side edge. Quickly pull up the dough, gently slap the bottom of the dough that is hanging down onto the counter in front of you so that it sticks, and then stretch and fold the top of the dough which is in your hands over the dough that has stuck to the counter like a hood. For the next slap and fold, grab the dough from where you first grabbed it so that as you go the dough will rotate a quarter turn with each fold. The first few slap and fold motions will seem very sticky and the dough will stick to the counter. The dough that is stuck to the counter will mostly come up as you progress, but from time to time use your bench scraper to remove excess dough from the counter. Use quick motions when pulling the dough up or removing your hands from the dough to minimize sticking. After several motions you will notice the dough coming together, sticking less, and becoming smoother as the gluten develops. Continue until the dough begins to smooth out and comes up fairly easily off the counter (4 minutes). How long to slap and fold will vary depending on your skill level, and how much gluten development your recipe needs. When you are done place the dough into a lightly oiled container, preferrable a low wide container to facilitate folding.Step 3 - Stretch and Fold:
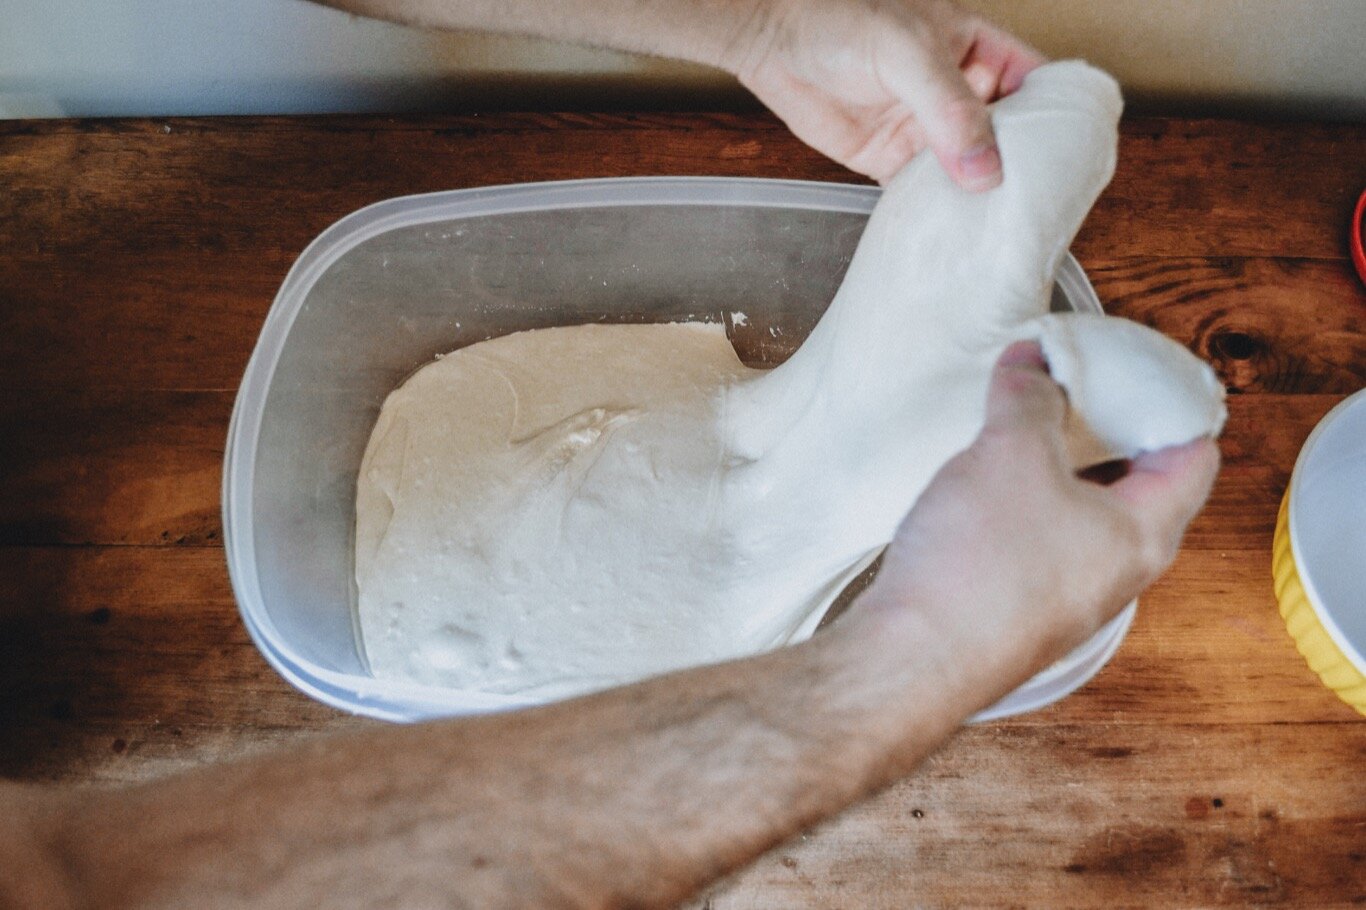
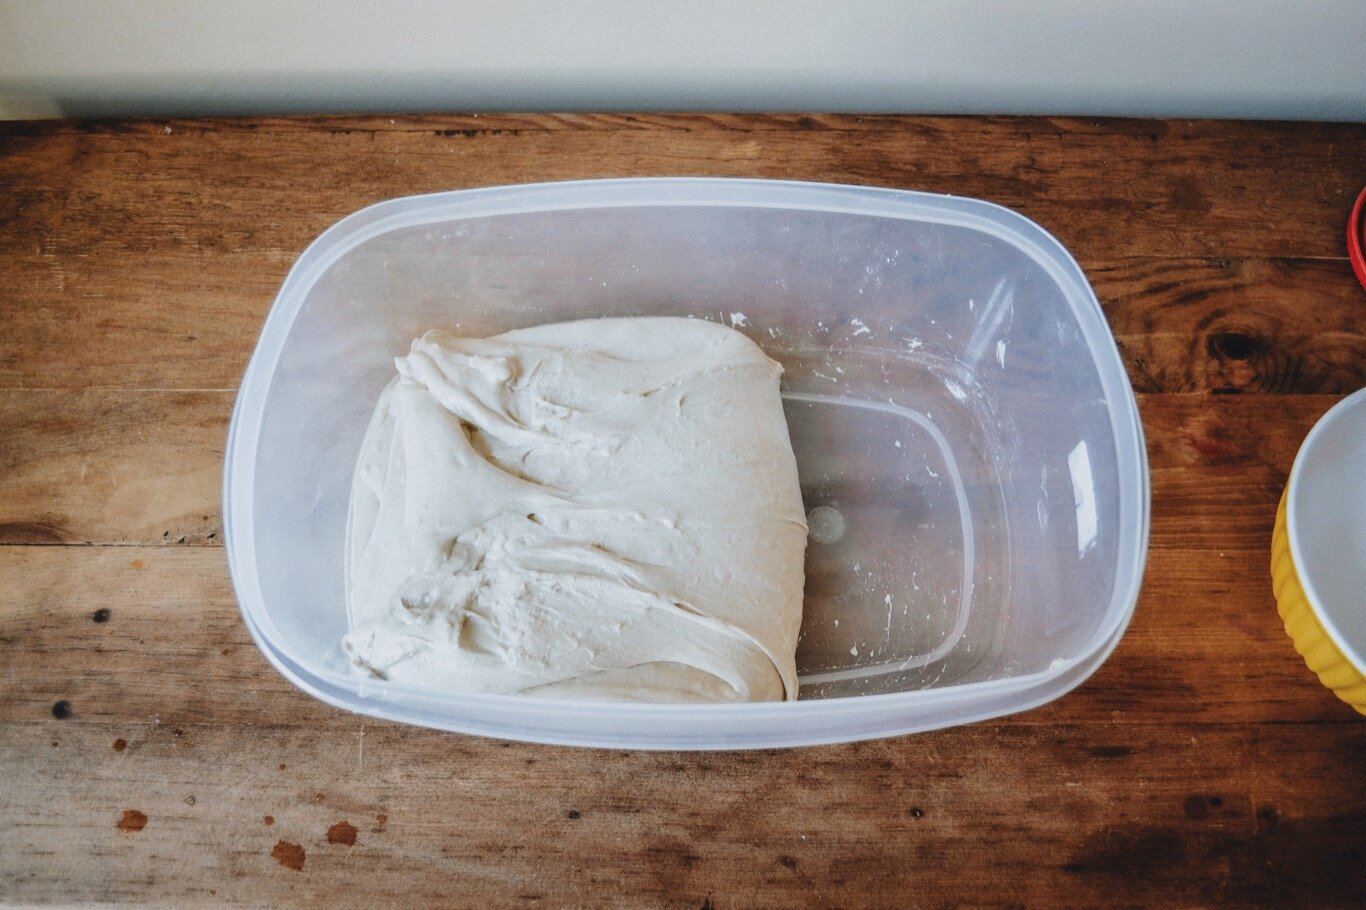
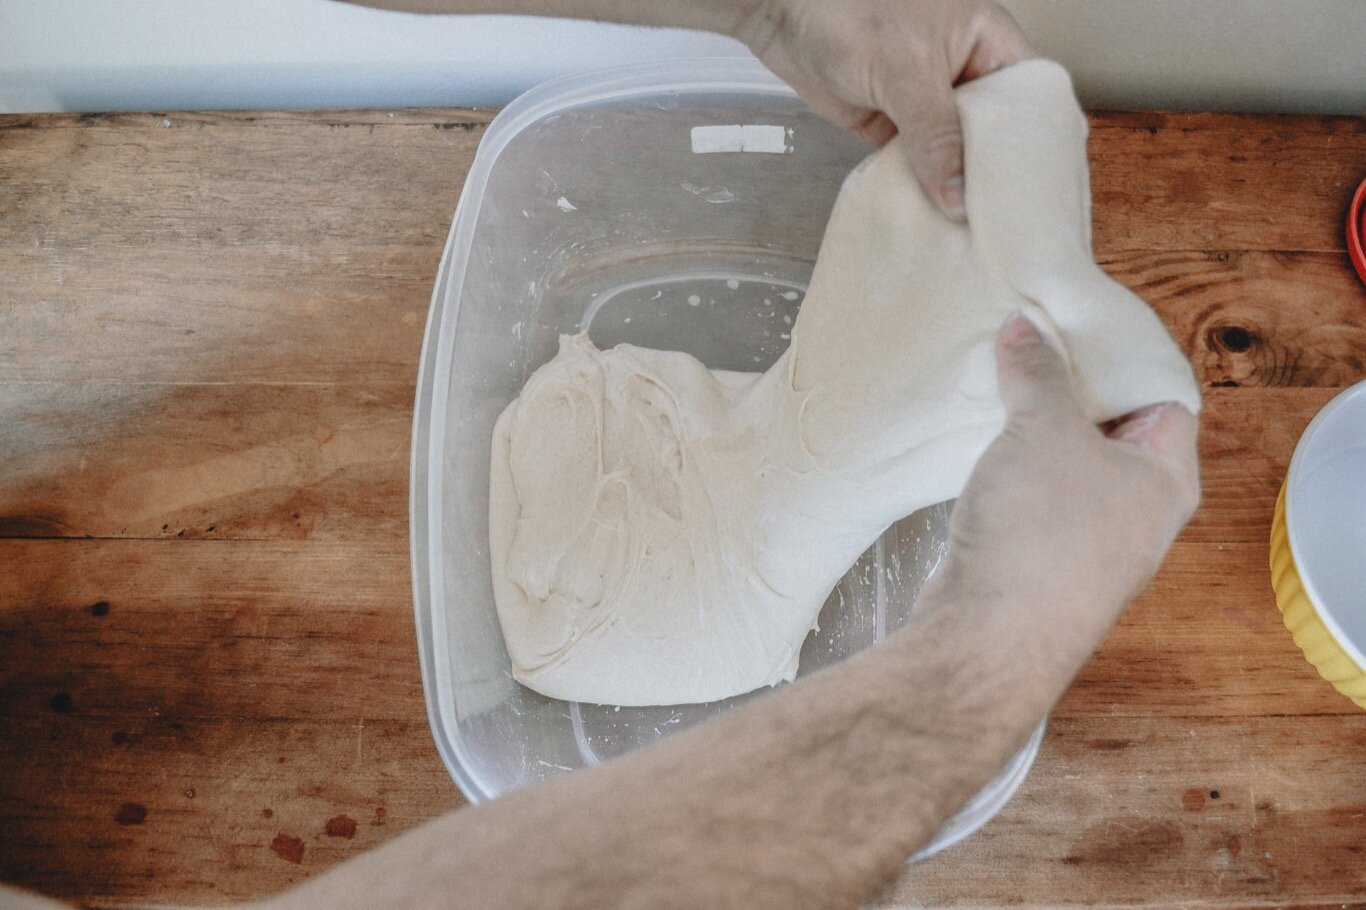
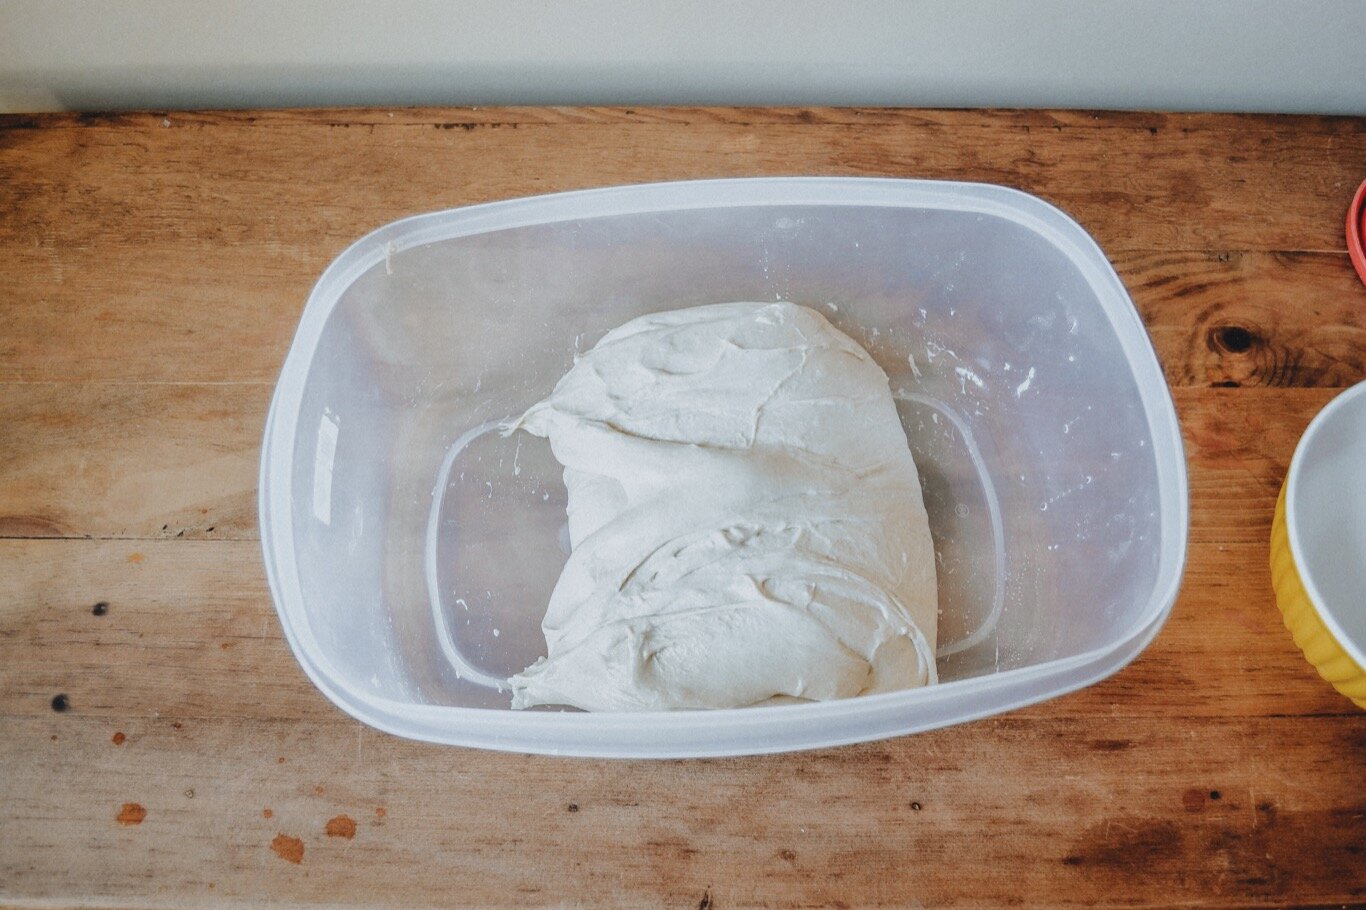
Not to be confused with slap and fold. Many bakers skip the slap and fold and use only the stretch and fold to develop the dough after hand mixing. The stretch and fold is used to both develop gluten strength in the dough and gently degas and aerate the dough during the long fermentation. The stretch and folds are usually performed only during the first hour or two of bulk fermentation to avoid degassing the dough too much in the later stages of fermentation before it gets divided. Depending on the strength of your dough after mixing, it will need 1-3 stretch and folds spaced out over the first 90 minutes of bulk fermentation. To begin, reach your fingers under the dough with both hands, gently stretch the dough up and fold it back over itself. Do not over stretch the dough so that it feels like it is tearing. Turn the container 90 degrees and repeat. Continue two more times until you have folded over from each of the 4 sides. If you are unsure of how many stretch and folds to perform, before stretching, wet your hands, grab a little dough and stretch it up. If it pulls up easily and is very extensible it is ready for another stretch and fold. If it resists stretching and is very elastic, it isn’t yet ready for another stretch and fold.
Bulk Fermentation
Bulk fermentation is the rising time between the mix and dividing (including stretch and fold). Bulk fermentation time is usually 3-5 hours. Warmer temperatures lead to faster fermentation. Doughs with whole grains and rye flour will also ferment more quickly. Look for approximately a 50% increase in dough volume to tell when the dough is ready. To get a feel for how aerated the dough is, place a small amount of flour on the top of the dough and press with your finger. If the dough is firm and bounces right back it needs more time. The length of fermentation will affect both the flavour and the strength of your dough. A longer bulk fermentation will lead to a stronger sour flavour in the final product. A longer bulk fermentation will also lead to a stronger dough, but only to a point. Excessive fermentation will lead to a breakdown of the dough.
Dividing the dough
For a small batch of two or three loaves you can likely just eyeball the division of the dough, but if you want to be precise use a kitchen scale. To begin, gently turn your dough out on the the counter. Some bakers turn their dough out onto a lightly floured counter, others will turn the dough out onto a dry or even lightly wetted counter. Avoid using too much flour as it will interfere with proper shaping of the dough. Using your bench knife cut off a piece of dough, trying to get as close to the desired weight as possible. Place to dough on the scale and either add to or subtract from the dough to get it to the weight you desire using as few cuts as possible.
Preshape the Dough
Preshape immediately after dividing. The preshape begins to develop the structure for the final shaping. Place the divided dough on the counter in front of you with the smoothest side up. Use an unfloured or very lightly floured counter. Using your bench knife push the dough away from you while rotating in an upside down J pattern and finish by pulling the dough towards you with the knife. As you pull the dough back towards you the dough will fold in under itself and create surface tension. Continue with several more motions until the dough has a smooth surface and has developed surface tension, but stop before the surface begins to tear. It is not necessary to get the dough really tight at this stage. Place the pre-shaped dough ball on the counter and cover it with a cloth. The dough now receives a ‘Bench Rest’ for 10-30 minutes. The bench rest provides the time needed for the gluten to relax enough to perform the final shaping. If the dough still seems too tight to shape (will not easily stretch), give it a longer bench rest before its final shaping. If the dough is very extensible (easily stretches), give it a shorter bench rest. Don’t worry if you’re unsure: It takes a bit of experience to get the feel for when the dough is ready.
Final Shaping
There are as many variations on the final shape as there are bakers. Here is a basic technique to use.
For an oblong loaf (Batard):
Lightly flour the top of the pre-shaped loaf. Using your bench knife, flip the dough upside down so the smooth top is on the counter. Place your fingertips under the dough at either end and gently stretch the dough out to the sides. Fold one side over the dough two thirds of the way across and lightly press it down (avoid degassing the dough as much as possible). Now fold the other side across to the middle and lightly press down. Grab the top of the dough with both hands, gently pull up, fold it over and tuck it back down onto itself near the top of the dough with your thumbs or index fingers. Continue rolling and tucking, developing surface tension as you go, until you reach the bottom of the dough. Roll the dough so that the seam where you did the last tuck is on on the opposite side of the loaf from you, and using the heel of your hand press along the seem to seal it.For a round loaf (Boule):
Lightly flour the top of the pre-shaped loaf. Using your bench knife, flip the dough upside down so the smooth top is on the counter. Lightly stretch the dough up from one side of the dough and gently press into the middle of the loaf. Continue around the loaf repeating 4-6 times and then flip the loaf seam side down in front of you. Cup your hands, place them on the counter with your baby fingers on the counter and pull the loaf towards you as you tuck the far end underneath creating surface tension. With one hand push the loaf away from you while rotating the loaf and again pull it towards you with both hands tucking it under and creating surface tension. Continue around the loaf until you have a medium tight ball that holds its shape. Don’t over tighten the dough or the surface will begin to tear.
Now you can place the shaped dough in a banneton or bowl lined with a tea towel seam side up to proof. Dust the banneton or tea towel with a mixture of 50/50 rice flour and white flour to prevent sticking. Rice flour is essential to prevent sticking. Alternatively you can dip the shaped loaf in a bowl filled with the flour mixture (seam side up) before placing it in the banneton.Proofing:
Proofing typically takes anywhere from 1.5 to 3 hours depending on how long the bulk fermentation was, what kind of flour you’re using, and what temperature the dough is proofing at. To test if the dough is fully proofed, place a small amount of flour on it to prevent sticking and gently press it with your finger. If the dough immediately bounces back, it is not ready. If the indentation slowly bounces back, but not quite all the way, your dough is fully proofed. If the indentation does not bounce back at all, the dough has over proofed. An over-proofed loaf will tend to flatten when turned out to bake, and will not reach its full volume or oven-spring potential.Retarding the Dough:
Shaped loaves can be retarded in the refrigerator for as long as 48 hours before being baked. This is a great way to get your bread making to fit your schedule. If you crave freshly baked bread after work or first thing in the morning, you can have dough ready to go and waiting in the refrigerator. Try making extra loaves on the weekend. Bake half of them the same day, and save the other half to bake fresh on Monday or Tuesday. Proof the dough for approximately 30-60 before refrigerating. If it is very warm in the kitchen loaves may need to be retarded without any room temperature proof. Retarded loaves will develop a stronger, more sour flavour, have a thicker crust, and will likely have a better bloom/oven spring when baked. The dough can be baked straight out of the refrigerator.Scoring the Dough:
Scoring the dough is an important part of the process. Scoring the dough allows the dough to fully expand in the oven which creates maximum volume. An unscored loaf will crust over before reaching its full expansion in the oven and the result will be a denser, less visually-appealing loaf. Cold dough that has been retarded is easier to score because the outer crust will have slightly dried and the dough will have developed extra strength while retarding.
The best tool for scoring is a double-edged razor. You can hold the blade in your hand, or place it on a handle, or attach it to a wooden stir stick. Bakers call this a lame. Hold the blade at an angle to the surface of the dough, and in one quick motion to avoid having the lame stick to the dough, create a small lip on the dough. This cut will facilitate maximum expansion as the dough bakes, and will result in a beautiful ‘ear’ or ‘grigne’. Aim for a cut of about ¼” deep. Loaves that are more proofed or overproofed require a shallower cut to prevent them from spreading too far, while stronger dough and slightly under-proofed dough can handle a slightly deeper score. There are many decorative possibilities with scoring patterns, but bear in mind different patterns will change the shape of the final loaf as they control the direction of dough’s expansion.
Baking at home
Getting a great crust and maximum oven spring requires the first part of the bake to happen in a very moist environment. A way to achieve this is to bake inside a dutch oven or lidded cast iron pot. The lid of the dutch oven keeps in the steam released from the hot dough to achieve the ideal environment. Professional bakers have ovens with steam injection, but the dutch oven method is the simplest way in a home oven to get a professional looking crust for hearth style loaves.
Preheat the dutch oven in the for an hour at 500 degrees, place your proofed dough on parchment, score it and transfer the dough on the parchment into the pot and cover with the lid before returning it to the oven. Be careful! 500 degrees is hot. Turn the oven down to 475. Remove the lid after 20 minutes and continue baking until the bread is dark brown.
Surprisingly, you can get almost the same result by baking in a thin metal roasting pan (the black ones with white spots). If you use a roasting pan, bake on top of a preheated pizza stone. There is no need to preheat the roasting pan.
An alternative method is to bake in an open oven on pizza stone. In order to create the steam for the first part of the bake, place a cast iron pan on the bottom of the oven or bottom rack depending on the oven. Fill the pan with chain or lava rock and preheat for an hour. After loading the oven, pour 1.5 cups of boiling water on the lava rock and quickly close the oven. Wear long oven mitts as a lot of steam is generated and it’s easy to get steam burns. Place a tea towel over the window of the oven when adding water to prevent dripping water from cracking the hot glass. Remember to remove it before closing the door! Remove the steam tray after 15 minutes or as soon as you notice the crust beginning to colour.