
The Perfect Pie Crust Guide

YIELDS: TWO PIES (FOUR CRUSTS)
This guide will walk you through how to make the flakiest, buttery, melt-in-your-mouth crust. This is the only crust recipe you ever need to know. I am telling you, it will transport you right back to your grandma’s kitchen! Fill crusts with your choice of filling, or pop them in the freezer for a quick, easy and absolutely delicious dessert.
Ingredients
CRUST
1020g Anita’s Organic All Purpose Flour
21/4tsp salt
360g ice water
675g cold butter
Zest of 1 orange or 2 lemons
Egg Wash
1 egg
2 egg yolks
1 tbsp milk
turbinado sugar, for sprinkling
Ingredient Review
Understanding the role each ingredient plays is the key to achieving tender, golden, flaky (perfect!) pie crust.
WATER
Water is necessary to bring the dough together and hydrate the flour, but it’s important to add just the right amount. Not enough water will lead to dough that won’t hold together and will crack as you roll it out, but too much water will lead sticky dough and a tough crust. Add the water a little bit at a time, just until the dough begins to form clumps and you can press it into a shaggy disc. Try misting dry bits with a spray bottle to avoid adding too much water.FLOUR
Start with great flour. For a basic pie crust, use Cake and Pastry flour, All Purpose flour, or a combination of both. Because of its lower gluten content, Cake and Pastry flour will lead to a lighter, more tender crust, but this dough may be more fragile and slightly harder to roll out. All Purpose flour will lead to a crust that rolls out well, but runs the risk of being tough from the over-development of gluten.FAT
Different fats lead to different results.BUTTER
For most people an all-butter crust wins out on flavour. Choose high quality unsalted butter, such as European-style cultured butter. The water content in butter gives the crust extra loft, puff, and larger flakes. Unfortunately, it can be difficult to get an all-butter crust to hold its shape, so decorative elements and crimping might lose their definition as they bake.SHORTENING
Shortening leads to a tender crust which holds its shape better in the oven than butter. Shortening crust will not puff up quite as much as a butter crust, and will have smaller flakes, but it will still be very flaky. If you want to keep your pie design crisp, and you don’t mind losing a bit on flavour, shortening is the way to go.LARD
Use lard if you are trying to capture the taste of the old-fashioned pie Grandma used to make. This crust will be very flaky with smaller flakes than butter.EGGS
Some pie crust recipes call for eggs. The protein in the whites help with structure and shape, and the fat in the yolks increase tenderness and richness. The yolks also add colour to the crust.SUGAR
Sugar adds flavour and helps with the coloration of the crust. Sugar can also make the crust slightly more tender.MILK or CREAM
The fat in milk or cream hinders gluten development and therefore can help with tenderizing the crust. The sugars in milk and cream result in more browning of the crust.SALT
Salt primarily affects the flavour of the crust although it does also affect the way the dough handles.LEMON JUICE or VINEGAR
Small quantities of acidic ingredients are often added to increase the dough’s extensibility, making it easier to roll out. There is debate in the pie world over how effective this is.VODKA
Many bakers swear by replacing some or all of the water with vodka. The theory is that the alcohol will not form gluten when mixed with flour, leading to a more tender crust. The jury is out on this one, so experiment and see if it works for you.
The Secret to flaky crust
Flaky crust is created by pieces of fat remaining intact throughout the dough. When the dough is rolled out, these pieces of fat form thin layers which separate during baking creating flakiness. By controlling the amount and size of the pieces of fat that remain in the dough, you can control the flakiness. Keeping everything cold is the key here, especially if you are working in a hot kitchen. Use cold butter, put your flour and even your bowl in the freezer for 10 minutes before mixing, use ice water, and work quickly. Another technique to increase flakiness is to fold the dough over itself 3-4 times to create more layers of fat before shaping it into discs.
STEP BY STEP CRUST GUIDE
CUTTING IN THE BUTTER
To begin, cut your butter into approximately ½” cubes. Try putting the cubes back in the refrigerator or freezer for five minutes to be sure they’re very cold before you begin cutting it in.
If you’re cutting in by hand, you can use a pastry blender, a bench scraper or two knives. Whichever method you use, the goal is to disperse the fat in the flour, leaving the fat in pieces that are between the size of a chickpea and a baby green pea. These chunks are what will create the flaky layers in your crust. You can also cut the butter in by pulsing it with the four in a food processor, taking care to ensure the fat is left in pea sized pieces.
WORKING IN THE LIQUID
Make a well in the centre of the flour and butter mixture and add the liquid ingredients, reserving approximately 25% of the liquid. Use ice-cold liquids to ensure the butter does not melt during mixing. Mix with a fork until the powdery flour is mostly worked in to a somewhat cohesive mixture. Squeeze a portion of the dough in your hand to see if it holds together. If it doesn’t, slowly add some of the remaining liquid until it does.
Place the dough mixture onto a sheet of parchment and then, using the parchment, fold the dough over on itself and press down, repeating 2-4 times to add layers for flakiness.
Use the parchment again to press the dough together and then divide it.
For a double crust pie, divide the dough 60/40 for the bottom/top crusts and press them into discs.
Roll the discs on parchment or a lightly floured surface to smooth out the edges. Starting with smooth edges will help reduce cracking when you roll out the crust. Wrap the discs in plastic or in reusable sandwich bags and refrigerate for at least 30 minutes and up to overnight.


Rolling Out
Ensure that the dough has chilled and rested in the fridge for at least half an hour (you can leave it as long as overnight). In addition to cooling the dough, the rest period allows the gluten to relax so the dough is easier to roll out. If the disc feels too firm straight out of the fridge, allow it to warm on the counter for 5-10 minutes before rolling to minimize cracking as you roll.
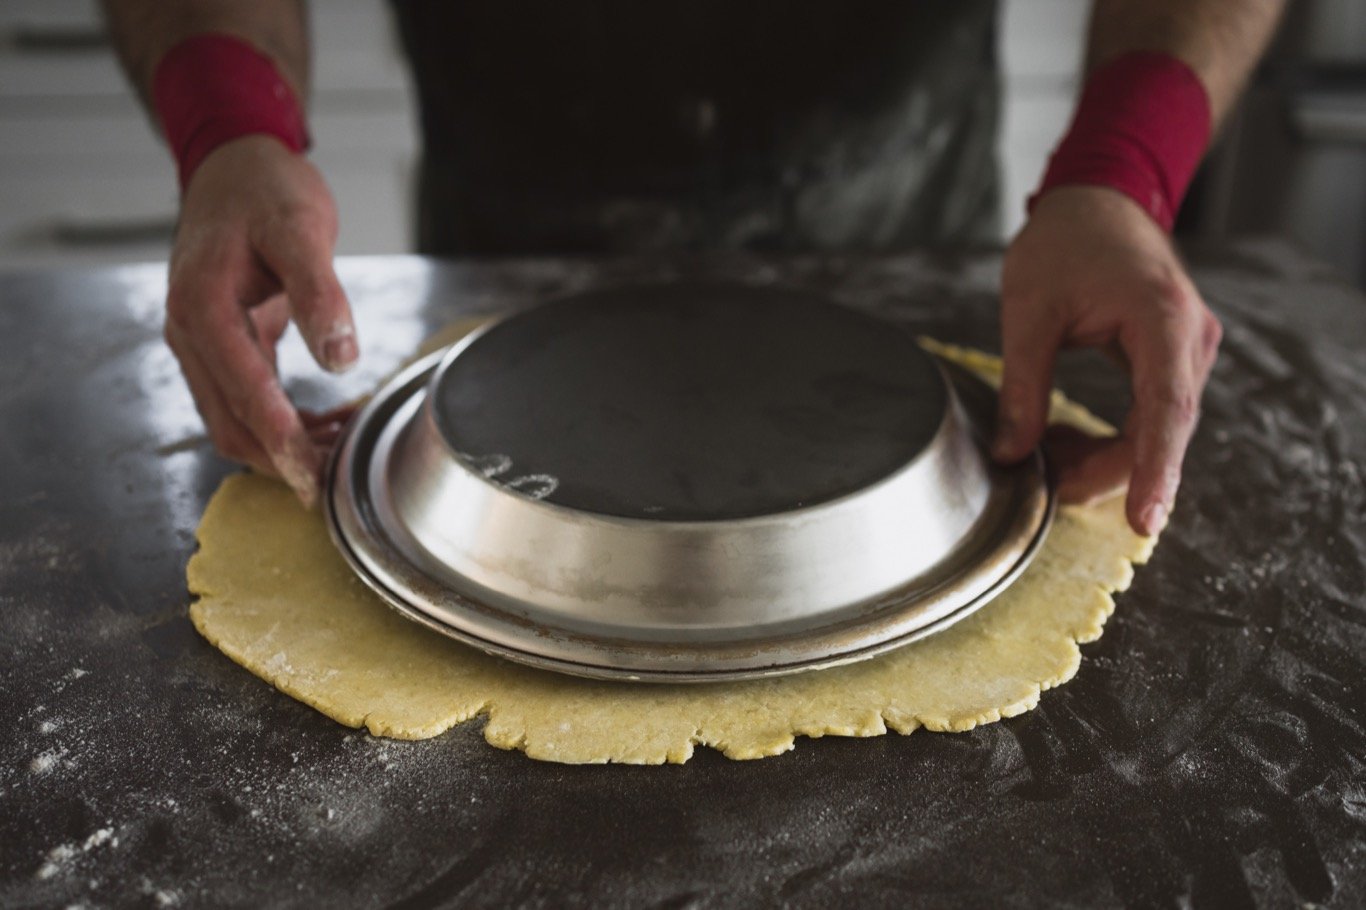
In very hot conditions, try using a chilled marble rolling pin to keep things cool. Place the dough on a lightly floured counter or pastry mat. Place the rolling pin in the centre of the dough and roll it away from you. Next, begin in the centre again and roll towards you. Turn the dough 45 degrees and repeat. From time to time run your hands under the dough to allow it to relax back a little bit before continuing. If the dough begins to stick, lightly dust with flour and flip the dough over. Use just enough flour to prevent sticking. It is crucial that the butter doesn’t melt at this stage. If the dough starts to get too warm, place it in the fridge for 10 minutes or freezer for 5 minutes to cool down. Use your pie pan to determine the final size of your dough. Add 4 inches to the diameter of the pan to allow for enough crust to cover the sides and have extra to flute the edges. Before you cut it, run your hands under the crust to allow it to relax and shrink back. (This will help you avoid having the crust shrink back in the pan.) Oil or butter your pan first so the pie will come cleanly out of the pan.
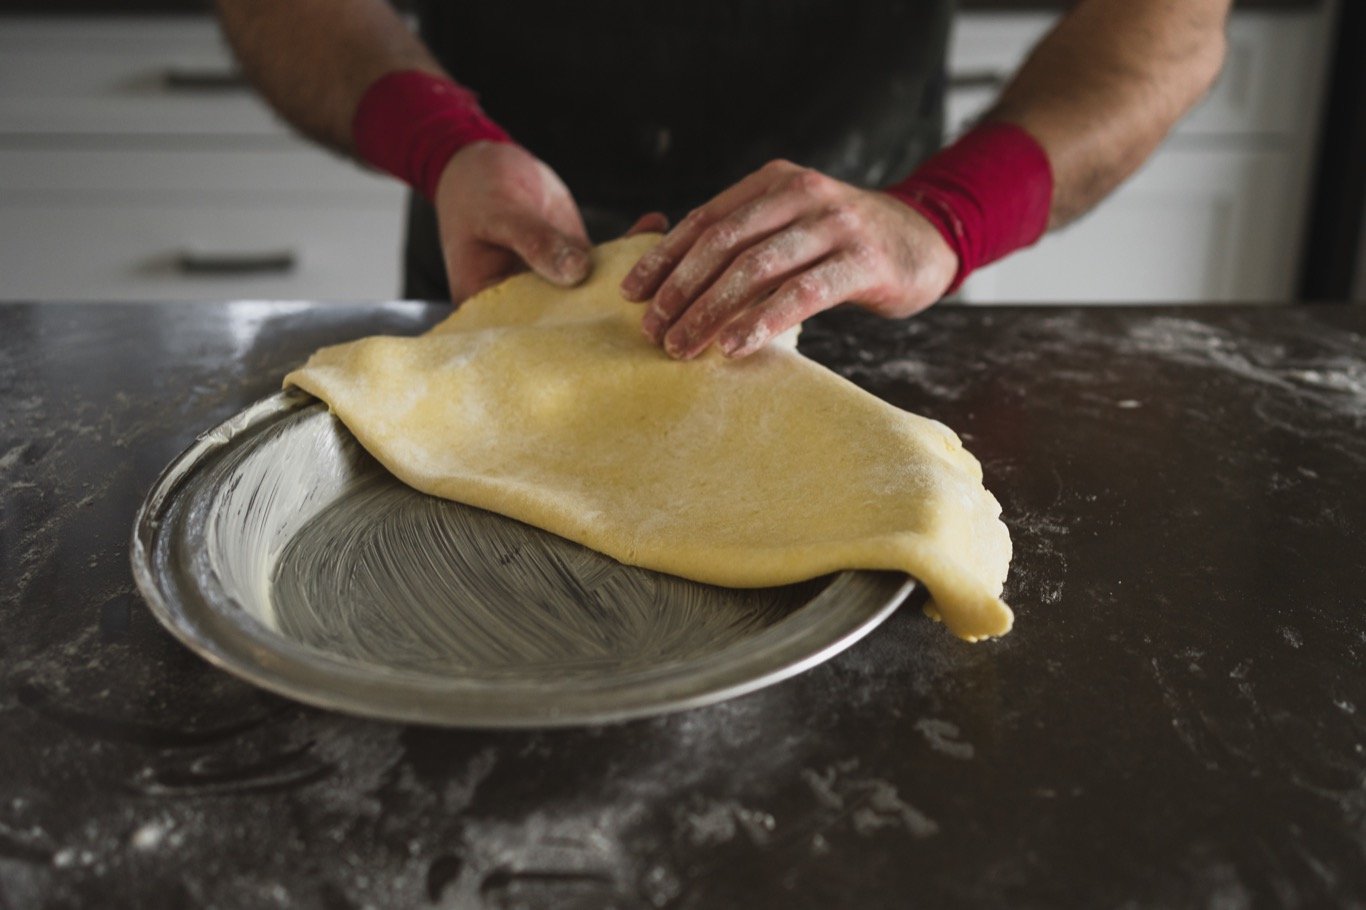
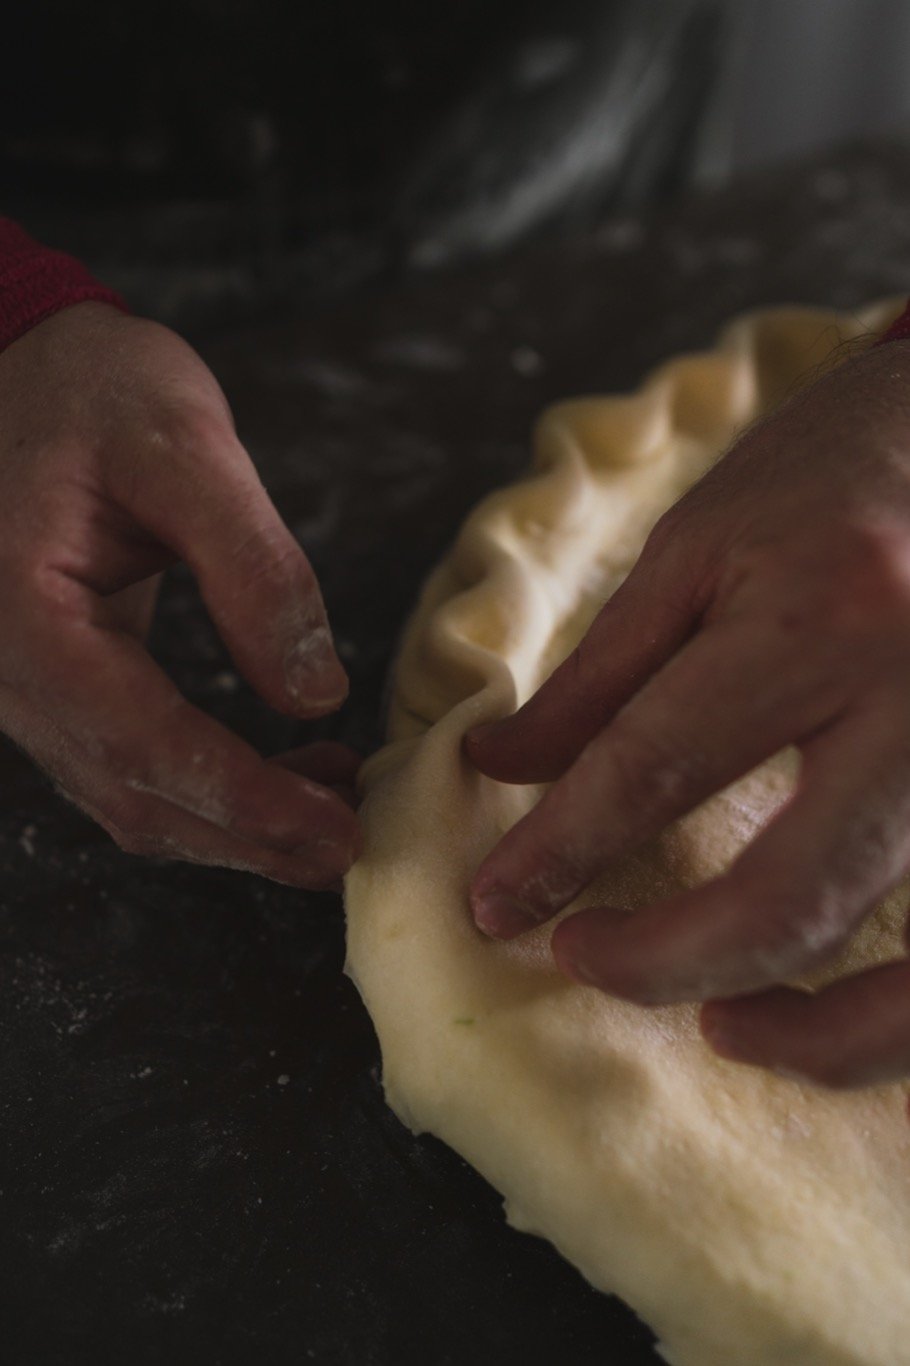
Do not stretch the crust when you place it in the pan, and be sure that it is fit tightly to the bottom or it will pull away from the sides during baking. For a single crust, trim the dough to about ¾” from the edge of the pan and fold the excess dough underneath. Using a finger and thumb on one side and one finger on the other, flute the edges of the crust around the pan. Chill the crust in the fridge for at least 10 minutes before filling and baking. If your crust is too warm, the butter will melt out early in the bake and ruin the crust.
For a top crust, roll out the top crust to be slightly larger than the diameter of your pan and refrigerate it before topping the pie. Fill the pie and add the top crust. To transfer delicate dough, use the rolling pin to lightly roll the crust up and unroll it over the pie or gently transfer it by sliding both hands under the rolled dough. There are several methods for sealing the top crust to the bottom. The simplest is to trim both top and bottom to the edge of the pan and crimp around the outside with a fork. Another method is to trim top and bottom slightly larger than the rim of the pan and fold under as you flute the edges all the way around the pan.
Be sure to make several slashes in the crust to allow steam to escape before baking. You can get artistic here if you want with your pattern of slashing, or you could even use a small cookie cutter to cut a pattern into the top.
Before baking, add an egg wash to the top of the crust with a pastry brush to add colour and shine to the baked crust. There are several options for wash depending on how you would like the pie to look. Egg whites promote browning, as does milk. Egg yolk promotes browning and gloss, and the addition of cream also promotes gloss. Adding salt helps to thin out the egg wash so it is easier to spread. If you’re unsure, a wash made of one yolk, one whole egg, and 1 teaspoon of cream is a good place to start. After washing you can also try adding coarse sanding sugar for some sparkle and sweet crunch.


Choosing A Pie Plate
There are many different kinds of pie plate available. Metal pans conduct heat more efficiently, especially darker metal. If you are having trouble getting your bottom crust browned, try a dark metal pie plate. Glass plates have the advantage of being able to see how well done the bottom of the pie is, but they don’t conduct heat as well and this may lead to the top of the crust being overdone. Stoneware and ceramic plates look beautiful on the table but are also not great heat conductors and will take longer to achieve a fully cooked bottom crust.
Oven Placement
Baking your pie on the lowest rack of the oven will help the bottom crust fully bake without the edges or top crust getting too dark. Also try placing your pie on a parchment-lined cookie sheet to keep drips off of the bottom of your oven.
Oven Temperature
Starting the bake hot will help with flakiness. The high temperature allows the crust to start setting before the fat completely melts out. Most recipes call for a hotter oven for the first part of the bake and then reducing the heat part way into the bake.
When Is The Pie Done Baking?
Your pie is ready 5-10 minutes after the filling begins to bubble. If the edges of the pie are browning too quickly, try using a pie shield or covering the edges with tinfoil. Allow the pie to fully cool before cutting to ensure that the filling will set.


Blueberry Pie
A slice of this blueberry pie tastes like a piece of heaven! If you love crust, say no more! This recipe doesn’t shy away from a thick, buttery, sweet crust.