
Demi Baguettes Guide
A brief baguette history
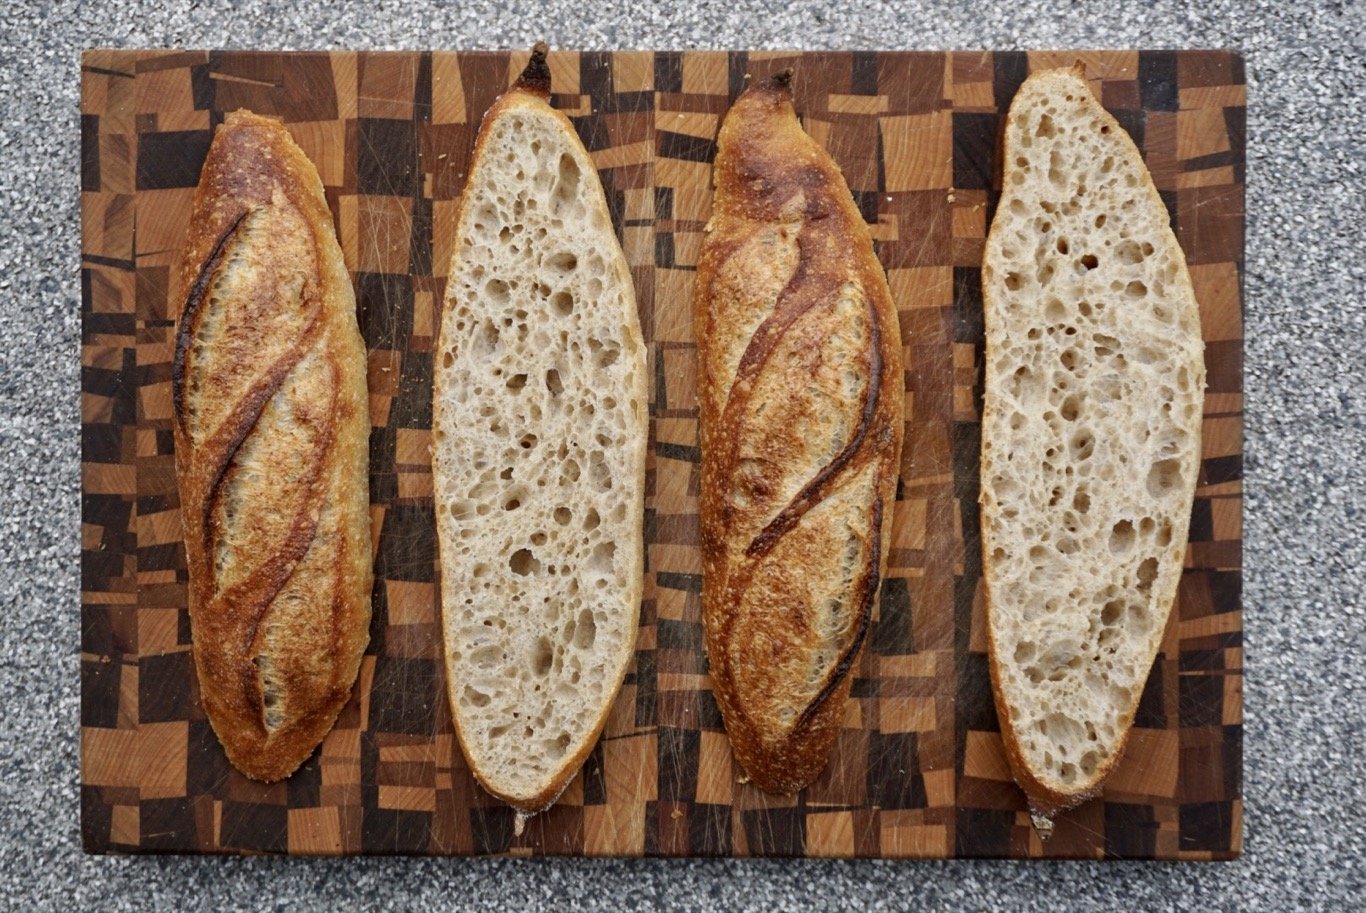
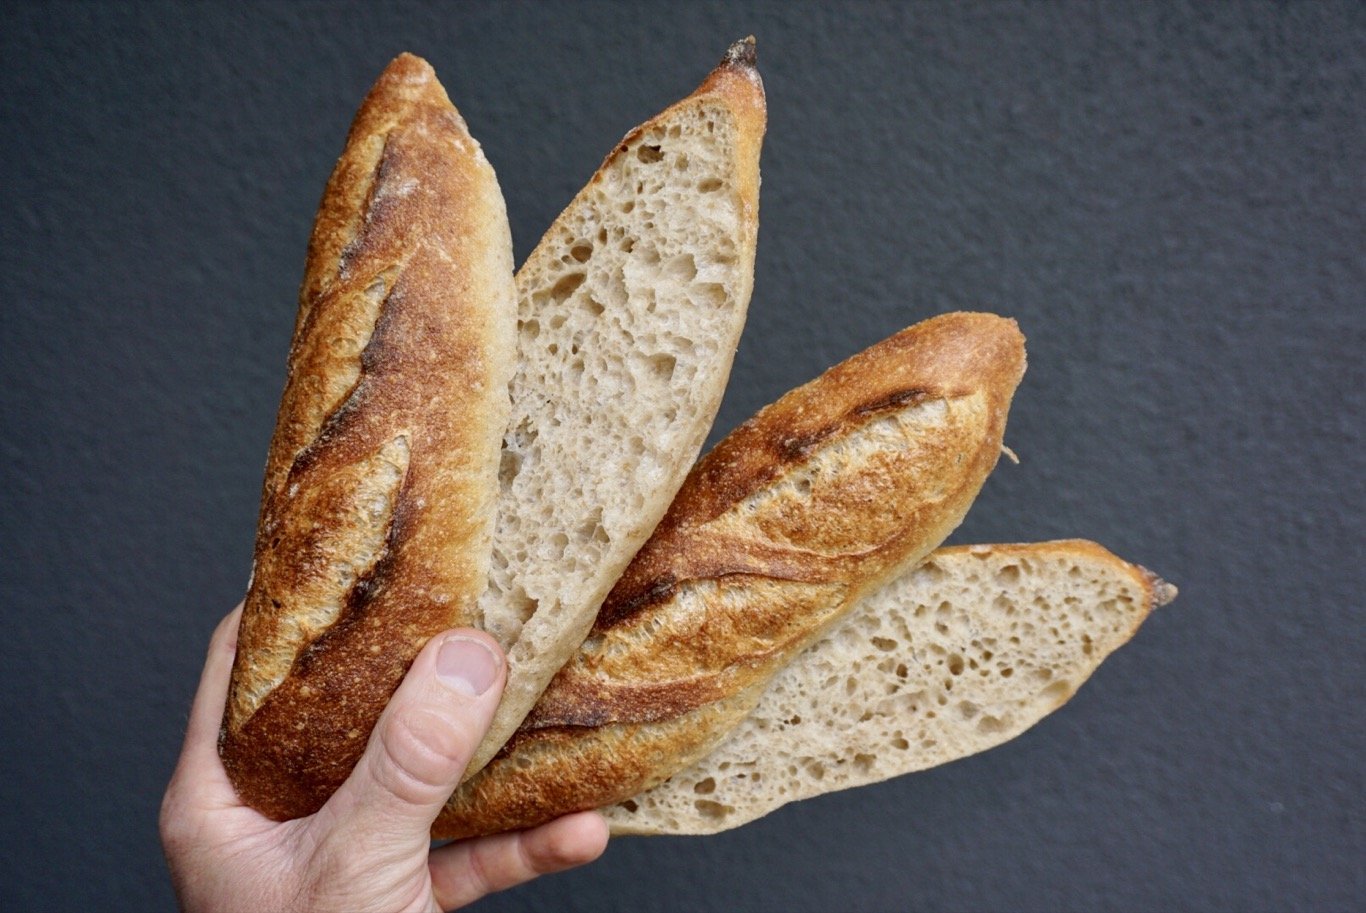
Baguettes are said to have originated in France in the 1920’s around the time steam ovens were introduced to French bakeries. However, before being given a name this bread is believed to have been around as early as 1799 after the French Revolution. Despite the varying historical accounts of this bread, we now know it best by its chewy texture surrounded by a crispy crust. It is also known as, “pain francais” meaning french bread, “baguette de pain” meaning wand of bread, and a few other names. A “demi” baguette simply means “half” the length of a traditional baguette which is generally around 24-30 inches long.
About this recipe
Demi baguettes take a bit of practice to get the fermentation and shaping just right. You can count on them tasting great, but don’t be discourage if the first attempt results in a less than perfect looking shape! One thing to note about baguettes is that unlike a loaf of bread, they don’t keep well. They will be light and crispy with a very thin crust on the first day but by the second day they become tough and chewy and not nearly as enjoyable to eat. This is why this recipe only makes two loaves. It is just the right amount for two deluxe sandwiches, or for serving with dinner alongside some olive oil and balsamic vinegar. Since this recipe only makes two at a time we’ve included an extra loaf of bread into the mix as well. As you will see in the guide below everything happens at a similar time as one loaf. Immediately after the final coil fold the baguette dough goes into the fridge and the bread dough continues its bulk fermentation as usual. The idea behind this is to develop the gluten early on in the process so that the majority of the dough rise happens after the shaping of the baguettes takes place.

Ingredients
480g (80%) Anita’s Organic All Purpose Flour
120g (20%) Anita’s Organic Whole Wheat
420g (70%) water
120g (20%) levain
12g (2%) salt
A STEP BY STEP GUIDE
First Day:
9:30am - Levain build with 20g Starter: 60g warm water: 60g Flour (75% White, 25% Rye)
1:40pm - Autolyse with 410g of the water
2:40pm - Mix in 120g of Levain
3:00pm - Mix in salt with the remaining 10g of water
3:20pm - Coil Fold
3:40pm - Coil Fold
4:00pm - Coil Fold
4:40pm - Coil Fold
5:20pm - Coil Fold
6:20pm - Divide off 370g of dough and place in a separate bowl. Coil fold both doughs separately. Cover the 370g dough with plastic and place in the fridge (this will be baguettes). Allow the other dough to continue its fermentation in a warm location.
8:40pm - Shape the bread dough, place in banneton, cover, place in fridge overnight.

After shaping, baguettes are placed onto a floured bakers’ couche. See video below.

For bulk fermentation, placed in a proofer, or somewhere warm with a cover on top.
Next Day
7:00am - Preheat Challenger Bread Pan (or a dutch oven) to 500°F (this is for the bread)
7:30am - Bake at 450°F for 22 minutes with the lid on and 20 minutes with the lid off. Add an ice cube just before putting the lid on to generate more steam.
9:00am - Take the baguette dough out of the fridge and divide in half (185g). Preshape while cold on an unfloured countertop into a tight little ball.
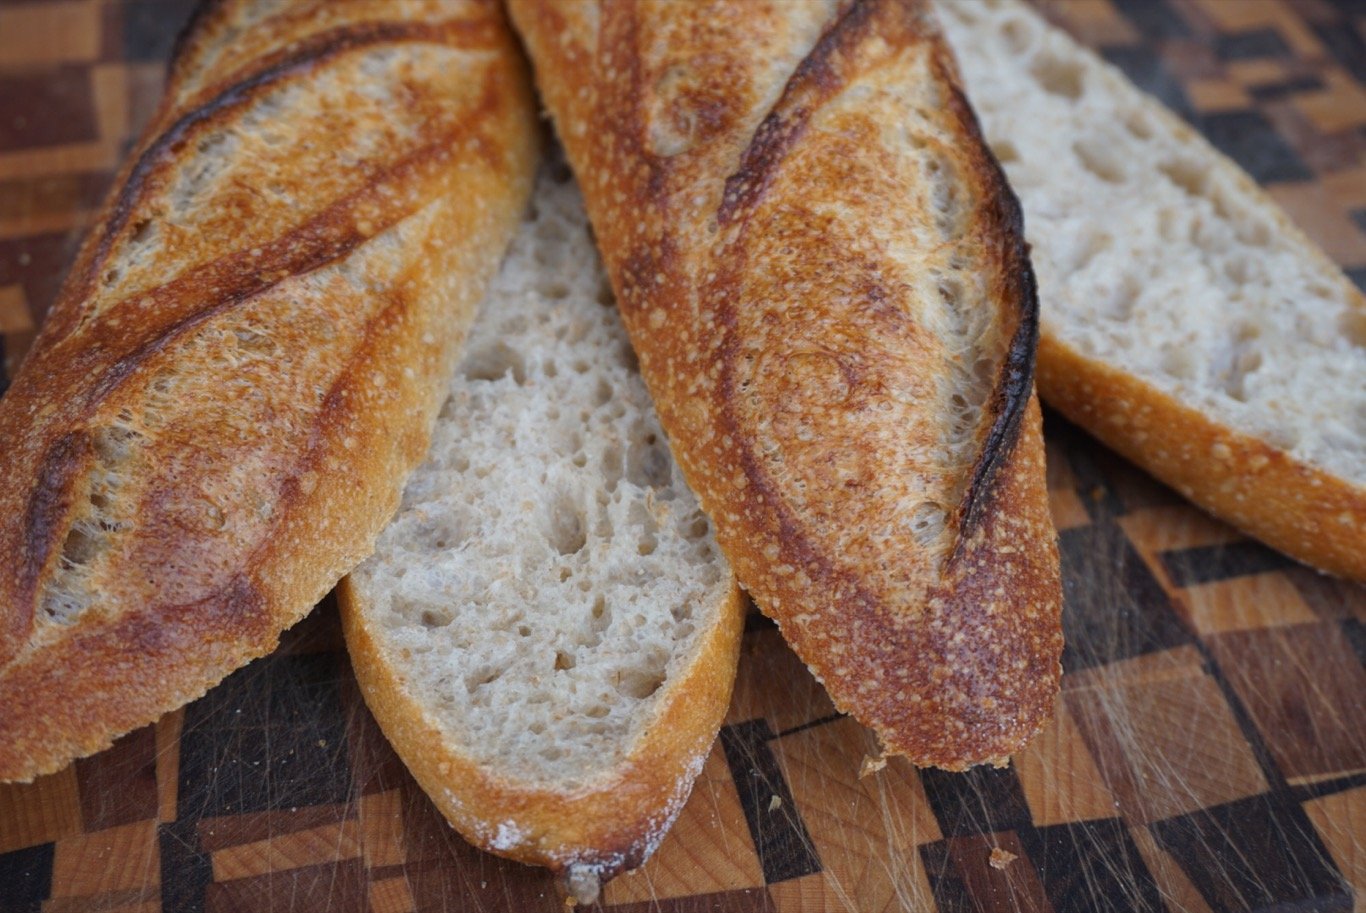
9:30am - Shape baguettes and place onto a floured bakers’ couche. This is going to take some practice. See the videos demonstrating this process. Essentially, you are going to be folding the dough onto itself four times and then rolling the tips to taper the ends. The first two folds are are simple straightforward folds. The second two folds are kind of a pinching/stitching motion. You want to use your thumb and forefinger to fold a little bit at a time back into the middle. Using the heel of your palm on the other hand you want to follow along and press the recently folded piece into the dough to seal into place. As you are doing these folds think about creating more and more tension on the underside of the dough. By this point your ball will now have turned into a log. The only thing left to do now is to taper the tips. To do this you want to evenly roll out both ends of the dough to a point without adding too much length. The centre of the dough does not need to be rolled much, focus more on the tips. Keep in mind the length of your pan, for example, in order to fit nicely into the Challenger Bread Pan aim for about 10 inches.
After shaping, pick up the shaped baguette and place it with the seam facing up (there should be a seam) on your floured couche. See photos below on how to set up the couche. Once the baguettes are sitting nicely in the couche place them somewhere warm to continue their bulk fermentation (remember we cut it short yesterday). Cover the dough by placing a plastic bag (or plastic alternative) over the top so that they don’t develop a skin on them. This is where a proofer really helps, but is not absolutely necessary.
12:30pm - Once the dough has risen nicely and looks plump, take out of the proofer *(or removed the plastic cover) and place in the fridge. Yes, we’re delaying these even further! We find that we get significantly better results when baked from cold.
4:30pm - Preheat pan or dutch oven to 500°F
5:00pm - Take the dough out of the fridge. With floured hands gently pick up a piece of dough and flip it over so that the seam is on the underside and place directly into your pan or onto a piece of parchment paper. Score the dough with long diagonal slashes and try to keep the angle of your blade low just like when you are trying to get a nice ear on a loaf of bread. Since we used a pan with a lid, we added an ice cube to help generate some extra steam. This will noticeably improve results compared to baking without a lid to trap that steam.
Bake at 450°F with the lid on for 15 minutes and then 10 more minutes with the lid off. Spin the pan halfway through the lid off phase for a more uniform look.


Notes
Take notes and photos to keep track of what worked and what didn’t.
If it doesn’t look like you hoped the first go around, try again! Like all baking, they really do taste and look better each time you make them when you’re first learning. So, practice, practice, practice!
On a standard loaf of bread, bulk fermentation time tends to be 6 hours. So we generally do the first part of the baguette fermentation for just over half of that (3.5 hours). After pulling out of the fridge the next day we will typically do another 3.5 hours, but some of that time is spent warming up. So these actually take more fermentation time than a loaf of bread (only because of the temperature). When trying to judge how long they should be in the couche for, just keep in mind how long the total fermentation time has been.
If you are making longer baguettes you may need to use a pizza peel or something similar to transfer the dough from the couch to the pan. With short cold ones like these picking them up works just fine.
Your fermentation times may vary depending on a lot of different factors. Use these times for the folding and the duration of the Bulk Fermentation only as a guideline. What worked for us may need to be tweaked a little bit for your bake.

Demi Baguette Recipe
Also known as, “pain francais” meaning french bread, “baguette de pain” meaning wand of bread, and a few other names, a “demi” baguette simply means “half” the length of a traditional baguette. This recipe has an amazing chewy texture surrounded by a crispy crust. Perfect for deluxe sandwiches, or for dipping into olive oil and balsamic alongside any meal.
This recipe was developed by one of our baking partners, Brendan Rivison. Thanks, Brendan!